English
 Português
 русский
 Chinese
 French
 Japanese
 Spanish

How to Polish Marble with Sandpaper: Basic Steps of Marble Polishing
2025-10-27 09:47:16
admin
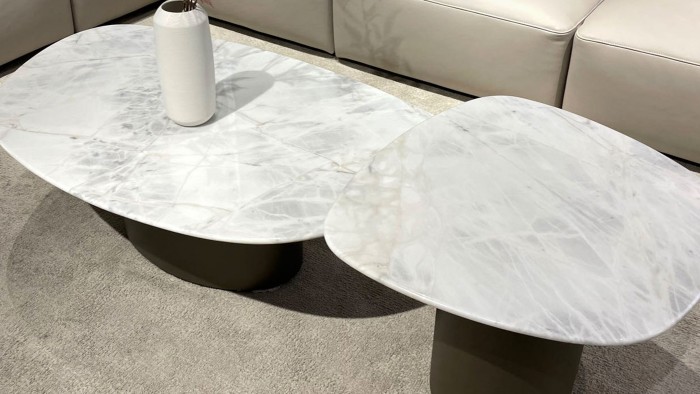
Polishing marble can significantly improve its appearance, bringing out its natural beauty and shine. While professional polishing services are available, many homeowners and DIY enthusiasts achieve excellent results using sandpaper. This article outlines the basic steps and considerations for polishing marble using sandpaper to ensure a smooth, shiny surface.
Prepare
1. Clean the surface:
Before you begin the polishing process, it is essential to thoroughly clean your marble surface. Use a mild detergent and water to remove any stains, dirt, or debris. You can use a soft cloth or sponge to clean it. Rinse the surface with clean water and allow it to dry completely before proceeding.
2. Assess surface condition:
Inspect the marble surface to determine its condition. If there are deep scratches, nicks, or severe wear, you may want to use a coarser sandpaper first. For smaller imperfections, you can start with a finer grit sandpaper.
3. Sandpaper grit for marble:
Sandpaper for marble comes in various grit sizes, which indicate the coarseness of the sandpaper. For marble polishing, the following grit sizes are recommended:
Coarse sandpaper (60-120): Use this for initial sanding to remove deep scratches and rough spots.
Medium grit sandpaper(220-400): This grit is suitable for smoothing the surface after rough sanding.
Fine sandpaper (600-2000): Use fine grit in the final polishing stage to achieve a smooth, shiny surface.
4. Gather necessary supplies:
In addition to the sandpaper, have a bucket of water, a clean polishing cloth, and a sanding block or sponge ready for better control while sanding. The water helps reduce dust and keeps the surface cool during the sanding process.
How to Sand Marble?
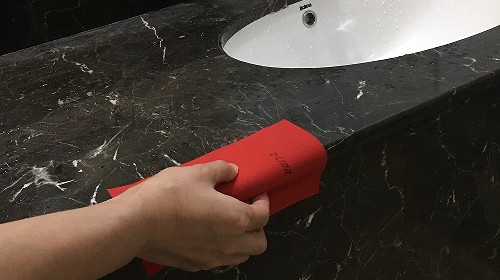
Step 1: Preliminary polishing with coarse sandpaper
Choose a coarse sandpaper: Start by using a coarse sandpaper (approximately 60-120 grit) to address any noticeable scratches or imperfections on the marble surface.
Polishing tips: When polishing, it is important to maintain a consistent direction. Apply gentle pressure while moving the sandpaper across the surface in the same direction. This tip will help avoid creating more scratches.
Addressing heavy scratches: If the scratch is deeper and needs extra attention, you can gently sand from left to right. However, don't use too much force as this may damage the marble.
Step 2: Rinse and clean
Keep a bucket of water nearby: During the polishing process, always keep a bucket of water handy. Rinse the polished area periodically to remove any particles left by the sandpaper. This step is crucial to keeping the surface flat and smooth.
Ensure cleanliness: Flushing not only helps remove debris, but it also allows you to see the progress of your polish. A clean surface will give a better indication of how much polishing is needed.
Step 3: Fine sandpaper application
Switch to finer sandpaper: After initial polishing, replace the coarse sandpaper with finer sandpaper (approximately 220-400 grit). This step is crucial for further refinement of the surface.
Repeat polishing technique: Follow the same polishing technique as step 1. Continue polishing in the same direction, applying light pressure, until the surface feels smooth and free of blemishes.
Check for imperfections: After each polishing, check the surface for any imperfections. Continue polishing if necessary until the marble surface is smooth and flawless.
Step 4: Final polish with polishing cloth
Prepare the polish: Once the surface is smooth, it’s time for the final polish. Use a polishing cloth and soak it in a suitable marble polish. Make sure the polish is evenly distributed on the cloth.
Polish in the same direction: Apply the polish evenly to the marble surface, using the same directional technique as before. This consistency helps achieve an even shine.
Let it dry: After applying the polish, do not wipe it off immediately. Allow to dry completely on surface. Drying time is critical for the polish to bond effectively to the marble.
Final wipe: After the polish has dried, lightly wipe the surface with a clean polishing cloth. This final step will enhance the shine and remove any excess polish.
Basic Considerations
Polishing marble is a beneficial process that can restore its natural beauty and enhance its durability. However, to achieve the best results and avoid damaging the surface, it is vital to follow certain precautions.
1. Check for cracks and damage
Before you begin the polishing process, carefully inspect the marble surface for any deep cracks, chips, or other forms of damage. If any major flaws are found, it is recommended to repair them before continuing with polishing. Ignoring these issues may cause further damage during the polishing process, resulting in a less than perfect finish.
2. Keep the sandpaper clean
During the polishing process, it is crucial to keep the sandpaper clean. Dust and debris can accumulate on the surface of the sandpaper, which can cause secondary scratches on the marble. To prevent this, frequently rinse the sandpaper in a bucket of water. This practice will not only maintain the effectiveness of the sandpaper, but it will also help keep the marble's surface smooth and flawless.
3. Polishing direction is consistent
When polishing, always work in the same direction. Avoid random rubbing or grinding, as this can leave new marks or scratches on the surface. A consistent motion helps achieve an even result and prevents unsightly patterns from forming. If you need to treat deeper scratches, you can gently polish from left to right, but be sure to return to the original direction for the last few passes.
4. How long should the polish be used?
When using polishes, be mindful of how long they remain on the marble surface. Leaving polish on for too long can cause damage, such as dulling or discoloration of the marble. Follow the manufacturer's instructions for application and drying times. After applying the polish, wait until it is completely dry before wiping it with a clean polishing cloth. This ensures that the polish has enough time to bond with the marble and achieve the desired shine.
In Conclusion
Polishing marble with sandpaper is a simple process that, if done correctly, can produce impressive results. By following the preparation steps and polishing process outlined above, you can restore the beauty of your marble surface. Remember to take your time, use the appropriate sandpaper grit for marble, and maintain a clean work environment for best results. With proper care and maintenance, your polished marble will continue to sparkle for years to come.

label:
marble sandpaper