English
 Português
 русский
 Chinese
 French
 Japanese
 Spanish

Marble Renovation: Detailed Steps from Staining to Mirror Polishing
2026-02-12 09:54:06
admin
Marble restoration is an essential step in restoring the beauty and functionality of marble surfaces. Over time, marble can develop stains, scratches, and dullness, losing its original luster and appeal. Marble polishing is a crucial step in the restoration process; it not only restores the stone’s smoothness but also prepares it for subsequent treatments, such as crystallization. This article will detail each step of marble restoration, from stain removal to achieving a final mirror finish.
The Importance of Marble Polishing
Marble polishing is crucial for several reasons:
Restore smoothness: The main purpose of polishing is to restore the smoothness of the marble surface, which is essential for both aesthetics and practicality.
Fundamentals for subsequent processing: Polishing lays the foundation for subsequent processes (such as crystallization), thereby enhancing the marble’s luster and durability.
Impact on final appearance: The quality of the polishing process directly affects the final appearance of the marble, so it is crucial to perform the polishing process correctly.
One of the key factors affecting polishing results is the linear speed of the stone polishing machine. This speed is influenced by a variety of factors, including equipment condition, machine quality, and the characteristics of the marble itself. Choosing the appropriate linear speed is crucial for maximizing efficiency and extending the lifespan of the polishing machine.
Selection of Polishing Machine
Choosing the right polishing machine is crucial for effective marble renovation. Different types of marble may require different polishing strategies and line speeds.
Linear speed: For example, for granite, the linear speed is typically controlled between 25 m/s and 35 m/s. This range ensures optimal processing results while improving work efficiency.
Machine type: Depending on the type and condition of the marble, different machines may be more suitable. For example, a rough surface may require a heavier machine, while a fine surface can be handled by a lighter machine.
During the operation, the appropriate linear speed must be selected according to the characteristics of the marble to ensure high-quality grinding and polishing results.
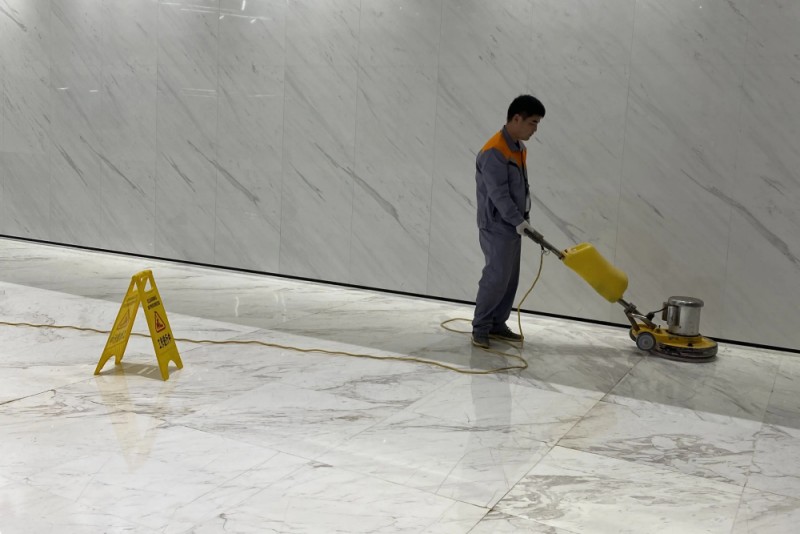
Adjusting the Cutting Depth
Depth of cut is another key parameter affecting diamond wear rate and grinding effect:
Recommended cutting depth: Generally, the cutting depth should be set between 1 mm and 10 mm. This range can be adjusted according to the specific characteristics and requirements of the marble.
Higher line speeds: When working at higher line speeds, it is recommended to use a smaller cutting depth. This method helps ensure effective grinding of the marble while avoiding damage to the surface.
Detailed Explanation of Renovation Steps
1. Floor cleaning
The first step in marble renovation is thorough cleaning. This step is crucial for ensuring a good polish. Here are some methods for effectively cleaning marble floors:
Remove debris: Use a knife and brush to scrape away concrete slurry, dirt, or dust. A vacuum cleaner can help remove fine particles, ensuring the surface is free of grit and impurities.
Importance of cleaning: Any residue left on the surface will affect the final smoothness and shine of the marble. A clean surface is essential for subsequent renovation steps.
2. Stone repair
After cleaning, the next step is to repair any damage to the marble surface:
Use marble adhesive: For small chips, cracks, or seams, use marble adhesive to fill the damaged area. This will help restore the integrity of the stone.
Seam cutting: After applying the adhesive, use a seam cutter to ensure the seams are cut evenly and consistently wide. This attention to detail will enhance the overall aesthetics of the marble.
Drying time: Ensure the marble adhesive is completely dry before proceeding with grinding and polishing. This ensures the repair is secure and prepares the area for subsequent treatment.
3. Grinding and polishing
Once the adhesive has dried, the sanding and polishing process can begin.
Begin grinding: Use a grinder to begin the grinding process. Start with coarse grit marble polishing pads and gradually increase the grit fineness, grinding a total of seven times. This gradual approach helps to effectively remove scratches and blemishes.
Pay attention to detail: Pay special attention to the grout lines between stones, along wall edges, decorative elements, and any irregular shapes. Ensuring these areas are properly sanded will help achieve a uniform finish.
Final polishing: After grinding, polish the surface with steel wool until the desired shine is achieved. This step is crucial to ensure a smooth, shiny surface with no noticeable gaps between the stones.
4. Ground treatment and maintenance
After polishing, it is very important to maintain and care for marble floors:
Surface drying: Use a water extractor and a blower to keep the stone surface dry. This step is crucial to prevent problems caused by moisture.
Use a cleaning agent: Spray the cleaning agent evenly onto the floor, then polish with a marble polisher. This helps to further clean the surface and prepare it for sealing.
Stone protection: For highly porosity stone, apply a marble protectant to enhance surface hardness and durability. After applying the protectant, repolish the surface to ensure a consistent shine.
Final polishing: Use a polishing pad to polish the floor to a mirror finish. This final step enhances the beauty of the marble and forms a protective layer.
Cleaning and maintenance: Finally, perform partial or overall cleaning and maintenance to ensure the floor remains beautiful and durable after use. Regular maintenance helps maintain the marble’s appearance and extends its lifespan.
In Conclusion
Marble restoration is a meticulous process, requiring careful attention at every step, from cleaning and repair to sanding and polishing. Following these steps can restore the shine to your marble surface, creating a stunning mirror-like finish and enhancing the elegance of your space. Whether you’re a professional or a DIY enthusiast, understanding the intricate details of marble restoration will help you achieve optimal results in your project.